Sites
A site is your website/webapp consisting of files that will be used for functionality and display purposes. With Spikster, every site is separated from each other because each app contains its own settings, database, permissions, and PHP-FPM pool. This method allows each user to be secure and protected in its own right. If one of your websites is compromised, the others would be completely safe.
The Sites area is for viewing your applications list, creating a new site, managing, or deleting one of them. The page will display:
- Site (main) Domain
- Site Aliases Number
- Site Server Name
- Site Server IP
- Site Action (Manage and Destroy Site)
Create a Site
To create a site, click on the New Site button in the Sites area and fill out the form with these data:
| Domain | The main site domain (e.g., domain.ltd or subdomain.domain.ltd) |
| Server | Destination Server |
| PHP-FPM version | PHP Version (7.4, 8.0, or 8.1) |
| Basepath | Entrypoint of Document Root (e.g., "public" in Laravel Applications) |
At the end, you will receive a summary with SFTP/SSH and database credentials useful to manage your new site.
Manage a Site
To manage a site, click on the Manage button in the Sites area, and Spikster will show you a page like this:

Information
Each site's information can be edited by filling out the "Site basic information" form in the "MANAGE SITE" area:
| Domain | Edit Site Main Domain |
| Basepath | Edit Entrypoint of Document Root |
Aliases
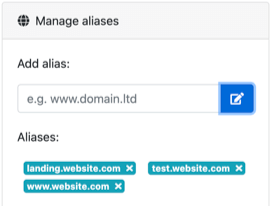
Spikster allows you to manage unlimited domain aliases for each site. You can manage them in the "Manage Alias" box in the "MANAGE SITE" area.
SSL Certs
Spikster generates free Let's Encrypt SSL certificates for each site domain and alias domains. To do this, ensure that your server's 443 port is open and click the "Generate SSLs" button in the "MANAGE SITE" area. Certificate renewal is managed automatically by the Spikster server client, so you don't need to worry about it.
SSH Reset
Every site is associated with a unique SSH user, so each site is isolated from the others. To reset the SSH user password, click on the "password reset SSH" button in the "MANAGE SITE" area. At the end, you will receive a summary with SFTP/SSH and database credentials.
Create MySQL Database
Creating a MySQL database is very easy with Spikster. Click on the "Create MySQL Database" button in the "MANAGE SITE" area, and you will receive a summary with SFTP/SSH and database credentials.
Delete MySQL Database
To delete a MySQL database, click on the "Delete MySQL Database.
MySQL Reset
Every site is associated with a MySQL database and MySQL user. To reset the MySQL user password, click on the "password reset MySQL" button in the "MANAGE SITE" area. At the end, you will receive a summary with SFTP/SSH and database credentials.
WordPress Installation
Spikster allows you to install WordPress with a single click. Click on the "Install WordPress" button in the "MANAGE SITE" area, and you will receive a summary with SFTP/SSH and database credentials.
GitHub Repository
Configuring a GitHub repository inside your site is very easy with Spikster. Follow the steps inside the "GitHub Repository" box in the "MANAGE SITE" area:
- Set GitHub repository
- Set repository branch
- Add deploy key into github.com
- Use sh script to deploy your site
PHP-FPM Version
For each site, you can choose which PHP FPM version to use with a simple select in the "MANAGE SITE" area. Available versions are:
- PHP 7.4
- PHP 8.0
- PHP 8.1
Supervisor Command
For each site, you can set a supervisor command by filling out the "supervisor" input in the "MANAGE SITE" area. For example, you can set queue jobs in a Laravel site using this command:
php /home/cpUser/web/artisan queue:work --sleep=3 --tries=3 --max-time=3600
Customize Site Nginx Conf
You can customize every Site Nginx configuration using the Spikster root user:
- Run
ssh Spikster@<server-ip> - Run
sudo nano /etc/nginx/Spikster/<app-user>.conf - Edit your custom configuration
- Run
sudo systemctl restart nginx.service
Destroy a Site
To destroy a site, simply click the Delete button in the "Sites" area.